The benefits of creating mirrored images
One of the fundamental design principles in art theory is ‘balance’ which means that an artwork is more pleasing if its elements are arranged equally. Symmetry is one method of achieving balance and occurs when half of something is mirrored to create a whole, much like a face. Mirroring an image is one of the easiest things you can do in Photoshop and it’s an incredibly effective and striking technique for a few reasons:
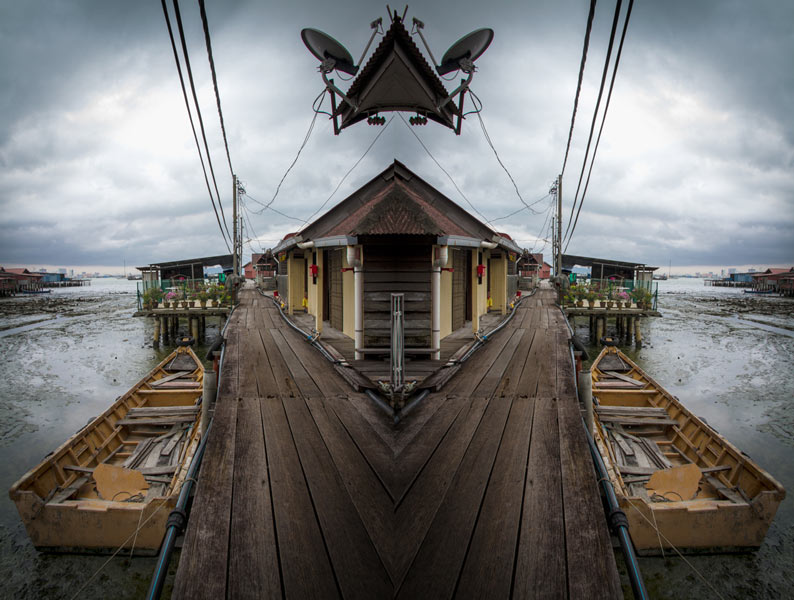
It directs the eye
If the elements in your main photo are anything but straight, mirroring the photo creates an interesting v shape where the photos meet, which is perfect for leading the eye to the centre and works well if you want to composite someone into the scene (just imagine someone standing at the juncture of this pier). The eye is also repelled by sameness so rather than the eye bouncing around the image it’s first drawn to the centre before travelling around the rest of the scene. Just be mindful when creating your mirror image that the two sides line up exactly.
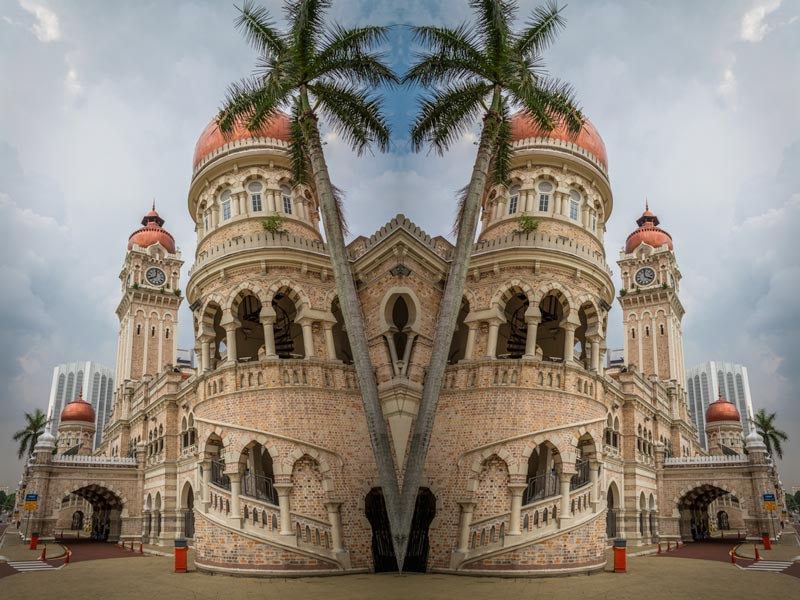
It’s interesting
Without really trying, mirroring an image immediately makes a scene interesting because it creates something unusual that we don’t see much in everyday life. This photo was taken with a wide angle lens which are known to make buildings lean, however the leaning buildings become really interesting in a mirrored scene.
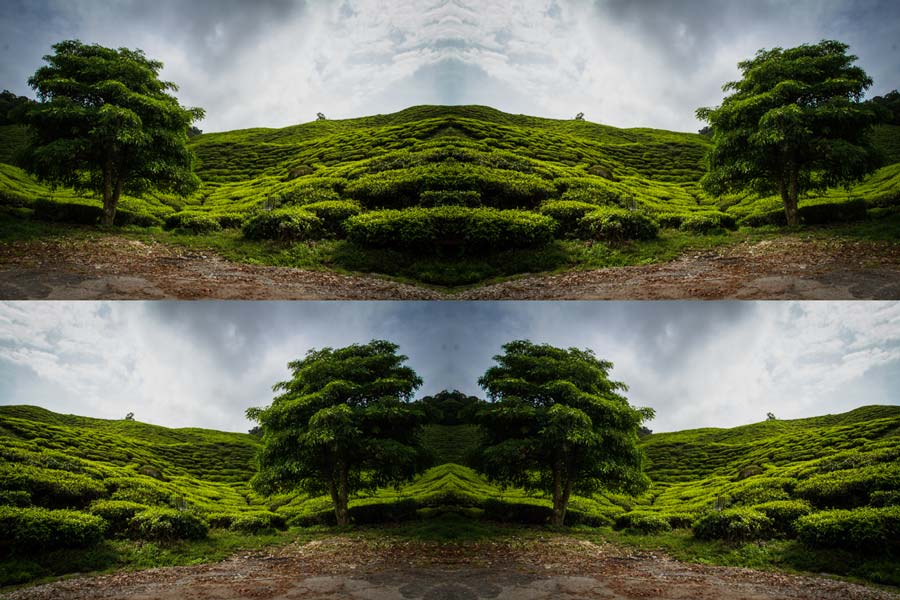
It helps stimulate ideas
I shot this photo at a tea plantation. The light in the scene is diffuse and moody but really there’s not a lot happening of interest. If I flip it one way all of a sudden it looks like there’s a staircase in the middle and the clouds form the shape of a Chinese dragon face so I could create some kind of deity descending the stairs.
When I flip it the other way the scene curving around the ground makes it look like a stage. I can imagine some kind of ritual being performed here while people watch on from the surrounding hills that resemble theatre seats.
I usually have to work pretty hard for my ideas when I am creating composites but these two popped straight into my head based on the shapes that the mirroring created and both could work equally well as composite locations.
It helps fix faults in an image
I photographed this bridge during a popular flower festival in a Japanese garden. It was swarming with people and I could have waited all day and not got a clear photo of this bridge. But as long as I have ONE SIDE clear, I can just flip it and voila, all the people are gone. Then I could just cut it out and composite it into another scene if I wanted.


Or, if I take a photo of someone who has partially blinked, or has a weird reflection in one of their glasses lenses, I can load that photo into Photoshop, create a new layer and use the clone stamp to make a copy of their good eye onto the new layer. Then I just flip that layer and move it into place over the bad eye, masking out any bits that don’t fit and then I have two great eyes.
It can make a prop or scene look bigger than it was
I have been collecting fake flowers for YEARS so I could one day create this image. Despite that I still didn’t have quite enough to cover the floor all around my head without leaving gaps. BUT, I knew that by bunching them up on one side I could mirror them to make the floor look full. (Alternatively I could have changed the arrangement of the flowers for the second shot so that the two sides would look different when mirrored.)
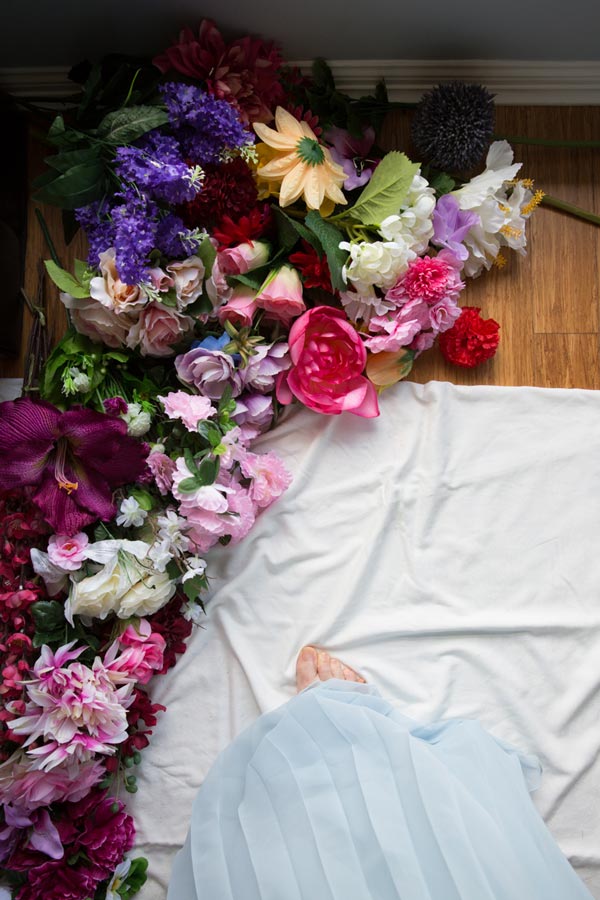
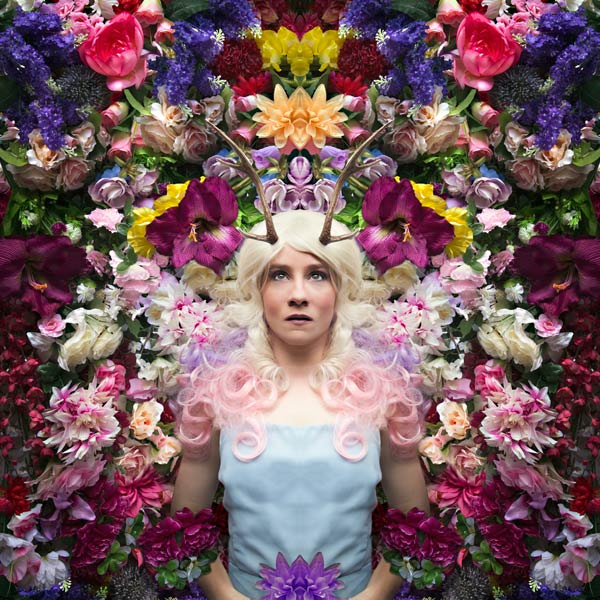
And of course, last of all, mirroring an image creates that all important balance.

Model & Styling: Elanora Wolffe, HMUA: Ashlee Finnigan, Headpiece: Husk & Vine
How to mirror an image in Photoshop
Please refer to video above for walkthrough
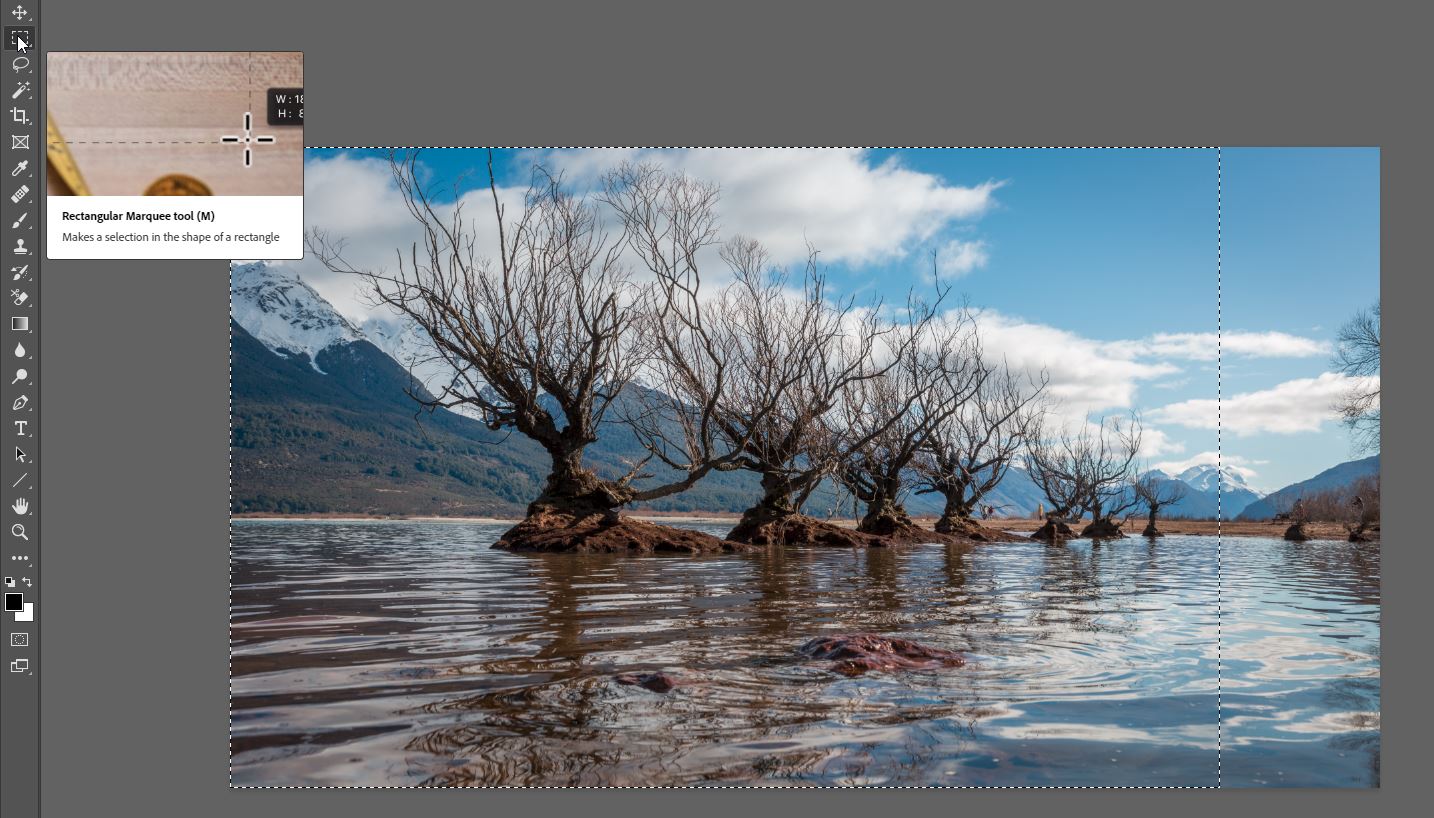
- Open your image in Photoshop.
- Duplicate it onto a new layer with Ctrl/Cmd J. If you only want to mirror a portion of the image select this area using the Rectangular Marquee tool (M) first. Then press Ctrl/Cmd J to pop this selection onto a new layer. Alternatively you can crop the image first, by pressing C and cropping to taste but ensure the ‘Delete Cropped Pixels’ in the toolbar’s options is ticked, otherwise Photoshop will try to flip the whole image. Ensure you untick the box again when done.
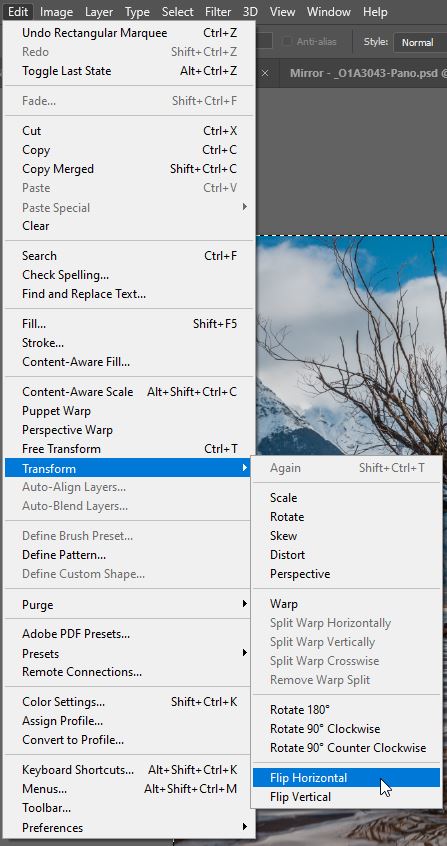
- Go to Edit>Transform>Flip Horizontal (or Vertical depending on your intention).
- Press C to activate your crop tool again and drag the edge of the image outwards to add roughly enough canvas space to fit the flipped image. Press the tick when you’re done.

- Press V to load the move tool and hold down Shift as you drag the second image into place (Shift keeps it aligned as it moves).

- Zoom right in to check that the images line up exactly (you will stop seeing a definite line between them). With the move tool still loaded (V) you can use your keyboard’s arrow keys to nudge the photo exactly into place.

- Choose your Crop tool again (C) and drag the crop back to the sides of your image.
